Creating a multi-source time-lapse
Putting together a time-lapse can be a fun reminder of the time you spent working on a project. This is the process I’ve used to create time-lapses for various projects.
Tools
Capturing
- Windows: Chronolapse or PowerShell
- macOS: Terminal
Editing
- Adobe Premiere
- PowerShell (Windows)
Capture the Screenshots
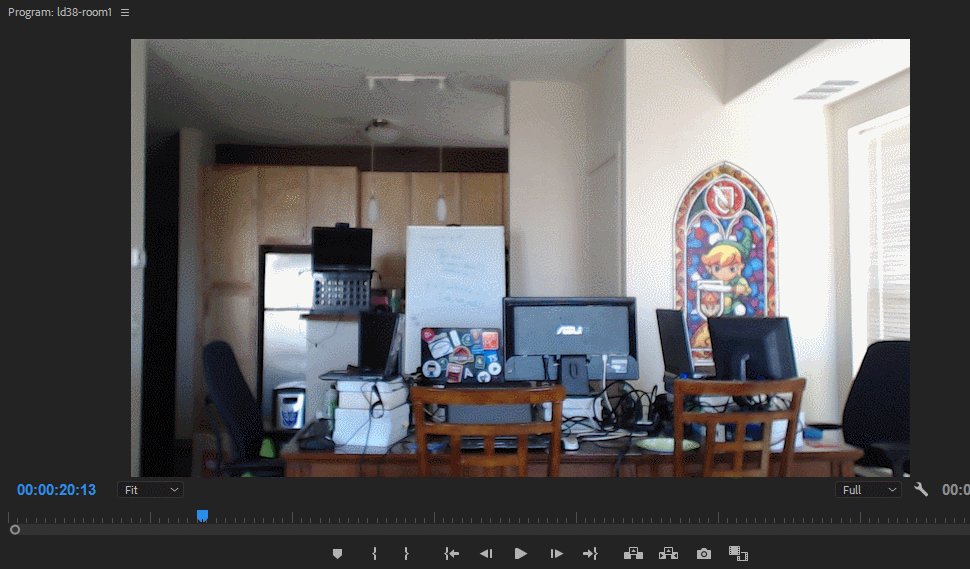
The first and most important step is to take some pictures! When my friends and I do this for game jams, we usually take screenshots on everyone’s computers. I also run a webcam in the corner of the room that takes photos of the whole team working together. I capture one image every minute. This creates a good amount of pictures to make a video at the end, without having to comb through too many of them.
For computers running Windows, we use Chronolapse. It allows for easy screenshots and webcam capture. If your computer setup has a combination of HiDPI and non-HiDPI monitors, or if Chronlapse doesn’t work for you, my friend Erik wrote a PowerShell script to take screenshots.
For macOS, you can paste the following snippet into a Terminal window:
| |
If you have more or less than two monitors, you can add or remove output locations from this script as needed.
Do Your Project
Make your game, application, painting, song, or whatever!
Prune the Screenshots
Once you’ve finished, ask everyone remove any images of their email inboxes or any other sensitive information. Then have them send you their screenshots! Once I get these from my cohorts, I usually check through them a second time to make sure nothing slipped through.
Rename the Screenshots
In order for Adobe Premiere to import an image sequence, we need to rename the images sequentially in the same pattern. If we used the Terminal snippet above, we’re fine. Chronolapse images are a little more complicated:
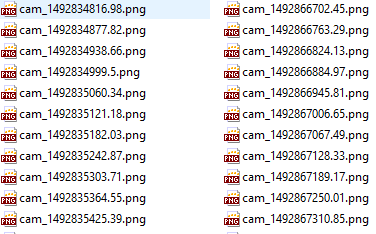
I do my video editing on a Windows machine, so I start by renaming the files by selecting all of them for a particular set and renaming them by right clicking on the first image in the sequence. This leaves me with a list of numbered screenshots:
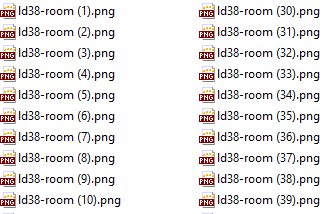
Then I use PowerShell to get rid of the parentheses:
| |
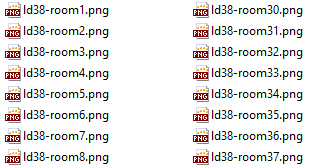
Once I’ve done this with each source, I’m ready to import them into Premiere.
I like to use 24 frames per second to slow down the time-lapse a little bit, so I updated the media settings for the framerate. Importing an image sequence is as simple as File => Import, and then picking the first image (be sure to check “Image Sequence” at the bottom of the Import window).
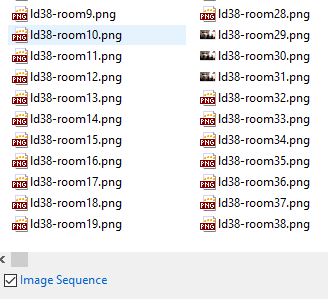
The sequence should show up in the bottom left panel of Premiere.
Arrange the Sources
Once we’ve imported all of our sources, we can drag a source over into the Timeline. Double clicking on it will let us resize it. Then we can position it wherever we like:
After we’ve done this for the rest of the sources, we can drag them around on timeline or edit them as much as we like. I personally only really ever use the “Speed/Duration” settings (right click on a source in the timeline) to help even out the duration of some of the videos.
Add Some Music
Get some public domain music (or something you have the rights to use), import it, and drag it onto the timeline. Most of my favorite background tracks come from places like the Free Music Archive.
Export the Final Video
I usually export in the H.264 format with “Use Maximum Render Quality” checked. The export settings you want to use will probably depend on the computer you’re working on, and if and where you want to upload your video.
We’re Done!
Now that it’s all finished, watch the video and enjoy!